How to Measure the Area for ACP Panel Installation
As a supplier of ACP (Aluminum Composite Panel) products, I understand that accurate area measurement is crucial for a successful ACP panel installation project. Whether you're a contractor, an architect, or a DIY enthusiast, getting the area measurement right from the start can save you time, money, and a lot of headaches. In this blog post, I'll guide you through the process of measuring the area for ACP panel installation, step by step.
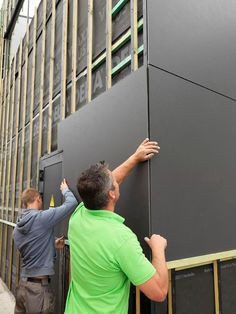
Understanding the Basics of ACP Panels
Before we dive into the measurement process, let's briefly discuss what ACP panels are and why they are so popular. ACP panels consist of two thin aluminum sheets bonded to a non-aluminum core, usually made of polyethylene or fire-resistant materials. These panels are known for their lightweight, durability, versatility, and aesthetic appeal, making them a popular choice for both interior and exterior applications, such as building facades, partitions, signage, and more.
We offer a wide range of ACP panels to meet different project requirements, including WPC Integrated Wall Board Bamboo Charcoal Board Wood Veneer Wall Panels For Interior Decoration, 4'x8' Aluminum Composite Panel, and High Quality Aluminum Composite Panel Building Material.
Tools You'll Need
To measure the area for ACP panel installation, you'll need the following tools:
- Measuring tape: A reliable measuring tape is essential for accurate measurements. Make sure it's long enough to measure the dimensions of the area you're working on.
- Pencil and paper: You'll need to jot down the measurements as you go along, so keep a pencil and paper handy.
- Calculator: A calculator will help you perform the necessary calculations quickly and accurately.
Step 1: Identify the Installation Area
The first step is to identify the area where you'll be installing the ACP panels. This could be a wall, a ceiling, a column, or any other surface. Take a good look at the area and note any irregularities, such as windows, doors, or protrusions, as these will affect the measurement.
Step 2: Measure the Length and Width
Once you've identified the installation area, use your measuring tape to measure the length and width of the area. Start by measuring the longest side of the area and record the measurement in feet or meters. Then, measure the shortest side and record that measurement as well.
For example, if you're measuring a rectangular wall that is 10 feet long and 8 feet wide, your measurements would be 10 feet (length) and 8 feet (width).
Step 3: Calculate the Area
To calculate the area of a rectangular or square area, simply multiply the length by the width. Using the example above, the area of the wall would be 10 feet x 8 feet = 80 square feet.
If the installation area is not a perfect rectangle or square, you'll need to break it down into smaller, regular shapes (such as rectangles, squares, triangles, or circles) and calculate the area of each shape separately. Then, add up the areas of all the shapes to get the total area.
For example, if the wall has a window that is 3 feet wide and 4 feet high, you'll need to subtract the area of the window from the total area of the wall. The area of the window would be 3 feet x 4 feet = 12 square feet. So, the total area of the wall after subtracting the window would be 80 square feet - 12 square feet = 68 square feet.
Step 4: Account for Waste and Overlap
When ordering ACP panels, it's important to account for waste and overlap. Waste refers to the material that is cut off during the installation process, while overlap refers to the amount of panel that is overlapped to ensure a seamless installation.
As a general rule of thumb, you should add 5% to 10% to the total area to account for waste and overlap. Using the example above, if the total area of the wall is 68 square feet, you would add 5% (or 3.4 square feet) to get a total of 71.4 square feet. This is the amount of ACP panels you'll need to order.
Step 5: Consider the Panel Size
When ordering ACP panels, you'll also need to consider the size of the panels. ACP panels come in a variety of sizes, including standard sizes such as 4'x8' (4 feet wide and 8 feet long) and custom sizes.
To minimize waste and ensure a more efficient installation, try to choose a panel size that is closest to the dimensions of the installation area. If necessary, you can cut the panels to fit the area, but this will increase the amount of waste.
Step 6: Double-Check Your Measurements
Before placing your order, it's always a good idea to double-check your measurements to make sure they are accurate. Measure the area again and recalculate the total area to confirm your calculations.
If you're unsure about any of the measurements or calculations, don't hesitate to contact us for assistance. Our team of experts is always happy to help you ensure that you order the right amount of ACP panels for your project.
Conclusion
Measuring the area for ACP panel installation is a relatively simple process, but it requires attention to detail and accuracy. By following the steps outlined in this blog post, you can ensure that you order the right amount of ACP panels for your project and avoid costly mistakes.

If you have any questions or need further assistance with your ACP panel installation project, please don't hesitate to contact us. We're here to help you every step of the way.
References
- Construction Math Handbook. McGraw-Hill Education.
- Aluminum Composite Panel Installation Guide. Industry Standard Publication.